Hello to all, and thank you for visiting my blog! This is my very first post, but defiantly not my last! Hope that you enjoy! (-:
As we all know we are in the middle of planting season. What better way to set your garden apart from everyone else than with one of these?
I will walk you through how I build one if these, and hopefully it will inspire one of your own!
As we all know we are in the middle of planting season. What better way to set your garden apart from everyone else than with one of these?
I will walk you through how I build one if these, and hopefully it will inspire one of your own!
First things first! Where do you find a chair to do your project?
There are many places to pick up an old chair. Thrift stores, antique shops, consignment stores, yard sales and flea markets, just to name a few.
I personally like using the ladder back chair. Very rustic country design.
Also buying in bulk to get a better deal, if you plan making a few of them.
There are many places to pick up an old chair. Thrift stores, antique shops, consignment stores, yard sales and flea markets, just to name a few.
I personally like using the ladder back chair. Very rustic country design.
Also buying in bulk to get a better deal, if you plan making a few of them.
I found this old wood school chair I bought in a bulk purchase. It had a varnish on the finish, so I wanted to rough that up a bit.
First I took off the seat. This one was east! All I did was remove two screws holding it in place. (some have cane bottoms that you cut away)
Than I took about a 60 grain sandpaper to really rough it up, so my paint would stick well. If you do not do that you have a chance of it peeling off later.
First I took off the seat. This one was east! All I did was remove two screws holding it in place. (some have cane bottoms that you cut away)
Than I took about a 60 grain sandpaper to really rough it up, so my paint would stick well. If you do not do that you have a chance of it peeling off later.
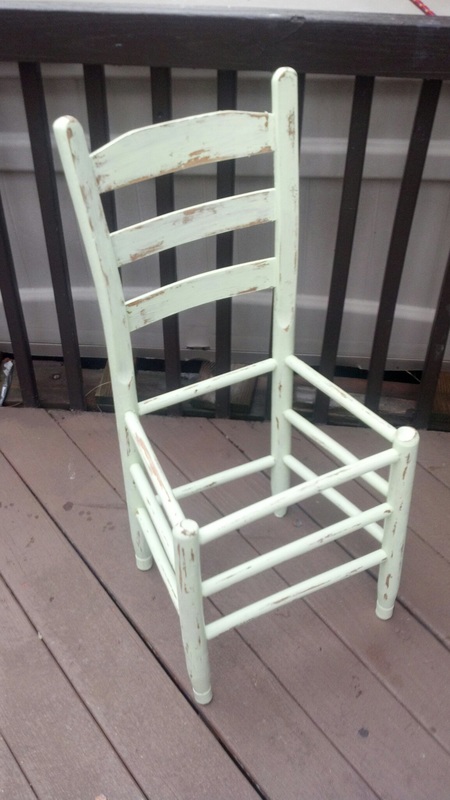
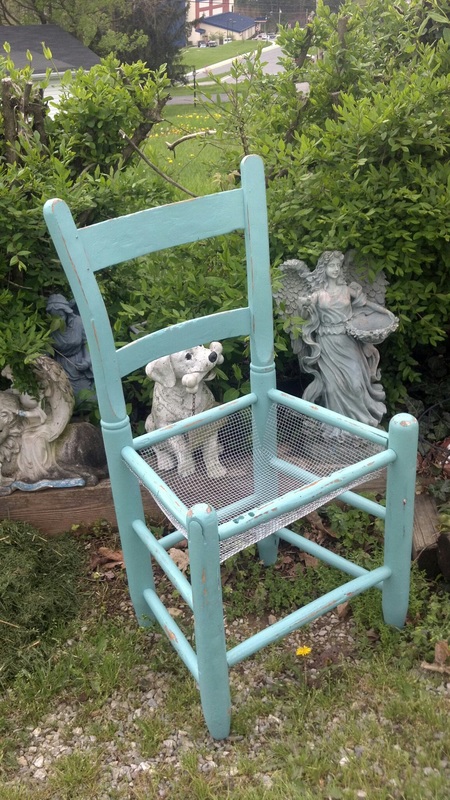
Next you need to find a good quality paint. This is where you need to spend the most money. In paint you do get what you pay for! I personally like mid grade self-priming Valspar. holds up great and covers in just two coats!
After the paint drys I like to take, about a 100 grain, sandpaper and shabby chic it up! (Put a coat if clear on it to protect from the weather)
After the paint drys I like to take, about a 100 grain, sandpaper and shabby chic it up! (Put a coat if clear on it to protect from the weather)
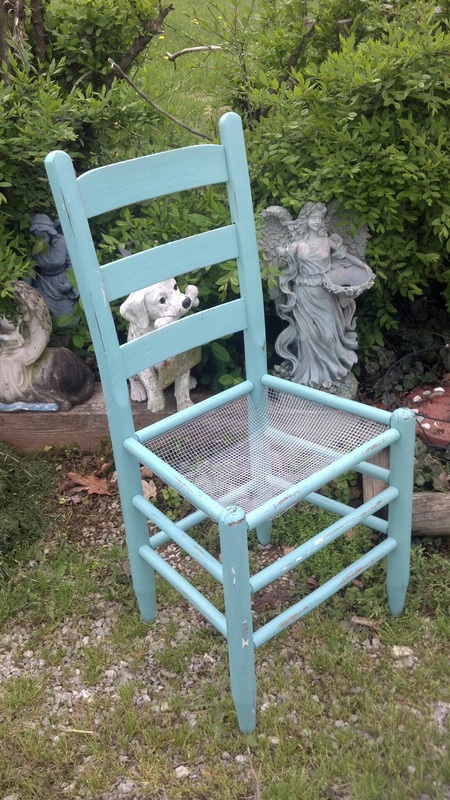
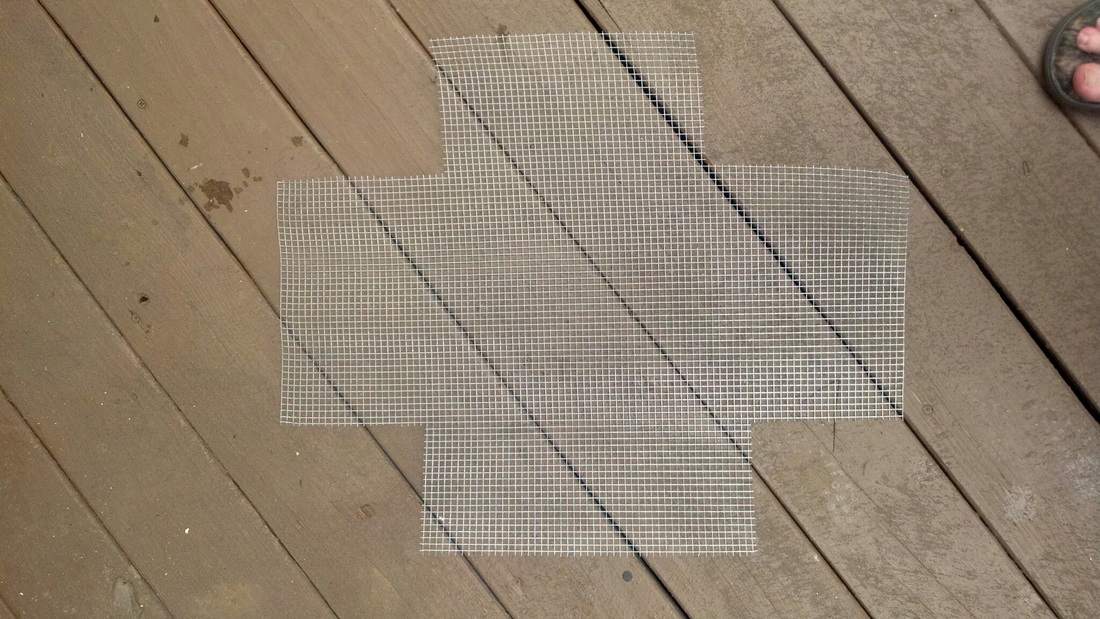
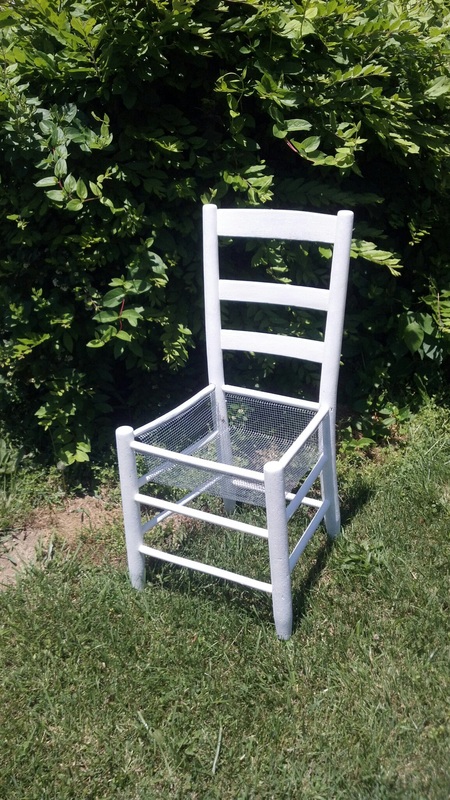
Finally you are ready for the wire bottom. You can use chicken (bigger holes) or rat wire (smaller holes).
I usually make it minimum 6" deep. This allows for plenty of dirt for the roots of the plants.
You can purchase this type of wire at any local hardware store.
I personally use the rat wire. It has a smaller rectangle hole. That makes it a lot harder for the dirt to fall through, but the water drains perfectly! (If using moss, make sure wire is plenty deep for the roots and dirt)
Also line the wire with garden paper. That also helps keep tge dirt from falling through.
Use a heavy duty stapler and staples, to attach.
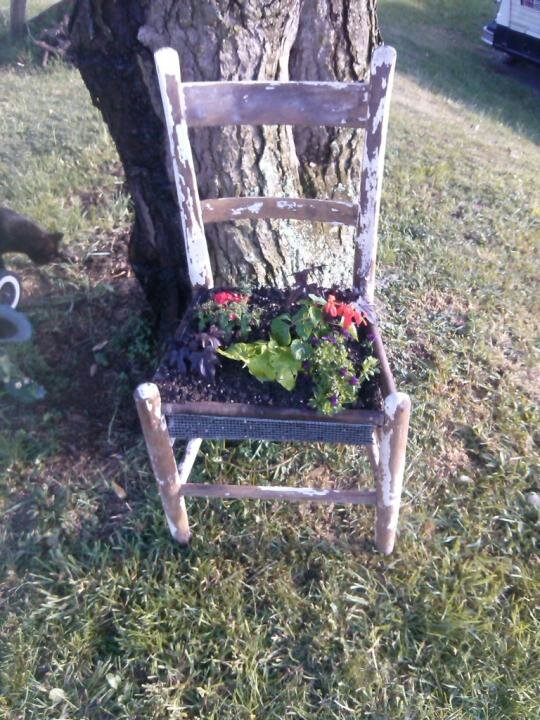
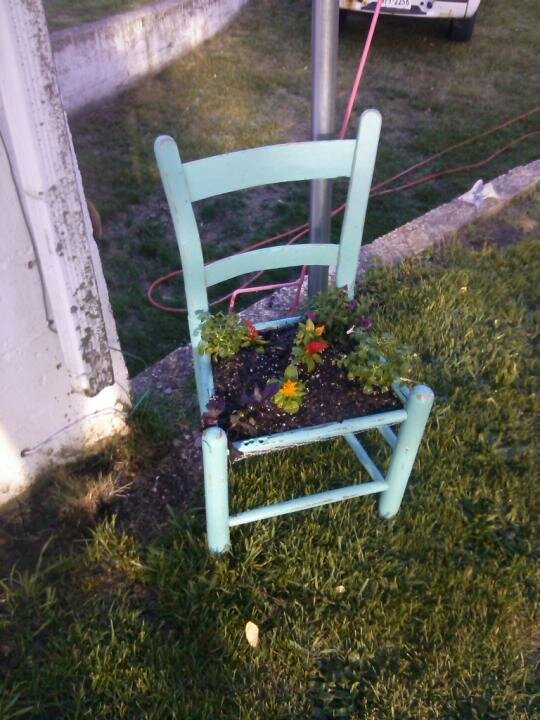
There you have it! A completed planters chair for your garden!
A project like this (if you purchase all materials) runs about $35.00 to complete.
If you like the idea contact me and i would love to make one for you!
www.rileysplaceonline.com
A project like this (if you purchase all materials) runs about $35.00 to complete.
If you like the idea contact me and i would love to make one for you!
www.rileysplaceonline.com
First things first! Where do you find a chair to do your project?
There are many places to pick up an old chair. Thrift stores, antique shops, consignment stores, yard sales and flea markets, just to name a few.
I personally like using the ladder back chair. Very rustic country design.
Also buying in bulk to get a better deal, if you plan making a few of them.
There are many places to pick up an old chair. Thrift stores, antique shops, consignment stores, yard sales and flea markets, just to name a few.
I personally like using the ladder back chair. Very rustic country design.
Also buying in bulk to get a better deal, if you plan making a few of them.

I found this old wood school chair I bought in a bulk purchase. It had a varnish on the finish, so I wanted to rough that up a bit.
First I took off the seat. This one was east! All I did was remove two screws holding it in place. (some have cane bottoms that you cut away)
Than I took about a 60 grain sandpaper to really rough it up, so my paint would stick well. If you do not do that you have a chance of it peeling off later.
First I took off the seat. This one was east! All I did was remove two screws holding it in place. (some have cane bottoms that you cut away)
Than I took about a 60 grain sandpaper to really rough it up, so my paint would stick well. If you do not do that you have a chance of it peeling off later.
Next you need to find a good quality paint. This is where you need to spend the most money. In paint you do get what you pay for! I personally like mid grade self-priming Valspar. holds up great and covers in just two coats!
After the paint drys I like to take, about a 100 grain, sandpaper and shabby chic it up! (Put a coat if clear on it to protect from the weather)
After the paint drys I like to take, about a 100 grain, sandpaper and shabby chic it up! (Put a coat if clear on it to protect from the weather)
Finally you are ready for the wire bottom. You can use chicken (bigger holes) or rat wire (smaller holes).
I usually make it minimum 6" deep. This allows for plenty of dirt for the roots of the plants.
You can purchase this type of wire at any local hardware store.
I personally use the rat wire. It has a smaller rectangle hole. That makes it a lot harder for the dirt to fall through, but the water drains perfectly! (If using moss, make sure wire is plenty deep for the roots and dirt)
Also line the wire with garden paper. That also helps keep tge dirt from falling through.
Use a heavy duty stapler and staples, to attach.
I usually make it minimum 6" deep. This allows for plenty of dirt for the roots of the plants.
You can purchase this type of wire at any local hardware store.
I personally use the rat wire. It has a smaller rectangle hole. That makes it a lot harder for the dirt to fall through, but the water drains perfectly! (If using moss, make sure wire is plenty deep for the roots and dirt)
Also line the wire with garden paper. That also helps keep tge dirt from falling through.
Use a heavy duty stapler and staples, to attach.

There you have it! A completed planters chair for your garden!
A project like this (if you purchase all materials) runs about $35.00 to complete.
If you like the idea contact me and i would love to make one for you!
www.rileysplaceonline.com
A project like this (if you purchase all materials) runs about $35.00 to complete.
If you like the idea contact me and i would love to make one for you!
www.rileysplaceonline.com
 RSS Feed
